Monday, August 25, 2014

A Compendium of Compost Mythology

It is a tribute to composting that humans have taken such a simple, natural process and elevated it through myth and misunderstanding into a form of new age alchemy. The spread of these myths has been facilitated by word of mouth, misguided publications from solid waste managers, and, worst of all, hard-core marketing. In order to keep composting simple and inexpensive, let's put to rest some of the more popular myths.

Compost Bins
There are scores of weird and wonderful commercial designs available: from black plastic Klingon boxes to rotating drums to free-wheeling spheres. The prices range from tens to hundreds of dollars. Advertisements and popular literature lead many composting novices to believe that an enclosed bin is essential. The reality is that heaps or piles work just fine. If you want to keep your pile tidy, consider using wire mesh, or reusing scrap lumber, shipping pallets, cinder blocks, or an old trash can. If you want a prefabricated bin, consider volume before you buy: more money is often less capacity, with the highest capacity models generally selling for less than 40 dollars.

Bioactivators
These bacteria-laden powders and liquids are the snake oil of composting. While they do contain "cultured" strains of bacteria and other additives, the fact is that special inoculants are unnecessary. Recent studies suggest that there are approximately 10 trillion bacteria in a spoonful of garden soil. Every fallen leaf and blade of grass you add to your pile is already covered with hundreds of thousands of bacteria -- more than enough to do the job.

Yeast, Elixirs, and Worms
There are a number of recommended additives for boosting compost performance, most of which are unsubstantiated or silly. Adding yeast is the most common, which is expensive and useless. Some practitioners suggest pouring Coca Cola into the pile to increase biological activity, which will take place, though mostly in the form of yellow jackets and ants. Adding worms or worm cocoons has grown in popularity due to some confusion with vermicomposting. Worms do a tremendous amount of good, but need not be purchased or transplanted: just build a pile and they will come.

Fertilizer
Adding fertilizer to increase the nitrogen content of a pile is wasteful and expensive. More importantly, synthetically derived fertilizers contain high salt levels and other compounds (perhaps even pesticides) which are harmful to worms and microorganisms. If you must have additional nitrogen, use organic sources: spent grounds from a coffee shop, a neighbor's grass clippings, agricultural manures, or dried blood.

Lime
Many gardeners with a high proportion of acid-rich materials mistakenly add lime to their pile to produce compost with a balanced pH. Unfortunately, adding ground limestone will turn your compost ecosystem into an ammonia factory, with nitrogen rapidly lost as a noxious gas. Finished compost is almost always lightly alkaline naturally.

Odors
A properly built and managed compost pile should smell like the humus-sweet duff of a forest floor. Odors result primarily through mistakes: trying to compost grass clippings by themselves, adding too many food scraps (or the wrong types of food), and anaerobic conditions caused by poor drainage or lack of aeration.

Rodents and Pests
Compost piles almost never attract pests if they contain only yard trimmings. Adding food to a pile increases the attractiveness somewhat, but only if managed improperly, such as dumping scraps on the top of a pile or bin. Urban composters might want to avoid adding food altogether or use a worm box or a completely enclosed design. Meanwhile, compost piles fall well behind birdfeeders, outdoor pet food bowls, pet feces, and trash containers as residential causes for rodent activity.

Layers
Adding different types of material to a compost pile in varying proportions is appropriate only if all of the materials are on hand at one time, which is seldom the case. Moreover, lasagna-style compost piles must still be mixed and turned to evenly distribute materials: discreet layers of grass will simply clump together and become anaerobic. Mix, stir, and fluff to cook up your delicious batch of hard-working compost stew.

Fourteen-day Compost
A number of magazine ads have hoodwinked well-intentioned gardeners into thinking that they must produce compost in 14 days. Such expectations are unrealistic and unworthy. Decomposition takes time. While producing compost quickly has some merit, no one should feel compelled to purchase chipper-shredders or other elaborate equipment. In fact, even if material looks like compost after several weeks, it still requires a one-month maturation period before it should be used in the garden.

Compost Calculus
For years, books, periodicals, and composting brochures have obsessed on carbon-to-nitrogen ratios. Regrettably, the arcane charts, tables, and formulas provided overwhelm many gardeners. In truth, compost piles thrive when different types of material (moist and dry, green and brown) are mixed together. And while ratios are fine for compost hobbyists, regular gardeners need only remember that all organic materials will compost in a timely manner given some prudent attention.

Copyright 2014, Joseph M. Keyser

Friday, August 22, 2014

Hanging with Your Indoor Plants

Indoor hanging plants seem to come and go in style. Unfortunately, many people lose interest in them because they become bored with little more than green fronds hanging over their heads. But hanging plants can offer a great deal more, depending on how they are selected.

A hanging plant does not simply mean Boston ferns, Swedish ivy, and spider plants, although these are remarkably easy to grow. There are some foliage plants which sport colorful stripes and veins, while others offer weird and intriguing leaf shapes. There are also a great many flowering plants ideal for indoor hanging baskets, each suited to different levels of light exposure, as well as temperature and humidity ranges.

In fact, it is possible to find an indoor hanging plant for every conceivable situation. The trick is actually reading plant labels before bringing a plant home and also doing some quick horticultural research before visiting a reliable garden center.

Some basic concerns for hanging plants involve just how you plan to hang them. Nothing is less appealing than simply dangling an inexpensive plastic pot from a hook in the ceiling. Instead, consider grouping three or five containers of various sizes together in an open, well-lit area and hanging them at different levels. Your arrangement will create a sense of both height and depth. While determining the height at which you will suspend the plants, keep in mind that you will want ready access to the plants for ongoing care. Sometimes it is best to hang pots no higher than eye level, depending on the location.

Also, the container need not be the typical plastic pot and attached saucer. The saucers often overflow, creating a mess, and the pots are usually very cheap in appearance. You might want to set a plain pot with drainage holes inside a more decorative pot or container without a drainage hole. You will avoid spills, and decorative containers can offer a broad range of textures and styles, which will enhance the overall appearance of your plants.

It is often useful to set plants into a soil-less medium to reduce weight, rather than relying on a heavier standard potting mix. Some soil-free mixes are specifically made for hanging plants and help conserve moisture and enhance aeration for growing roots.

When it is time to water your plants, it is preferable to actually take the plant down and water it in a sink, at least on occasion. This approach ensures complete drainage, and also allows you to inspect the plant more closely for pests while tending to damaged foliage, dead flowers, and other pruning chores. In addition, use this opportunity to thoroughly rinse off the foliage, removing potential pests and dust. In fact, removing dust actually increases the amount of light which can reach the leaf surface.

As for the plants, do not limit yourself to traditional selections. Common asparagus ferns are all well and good, but why not a look a bit further for a special cultivar like Emerald fern (Sprenger asparagus)? And why settle for plain green foliage when there are hundreds of variegated plant species which will give you bursts of gold, cream, and brilliant yellow, such as the popular Goldfish plant (Columnea microphylla)? Or substitute variegated Swedish ivy (Olectranthus coleoides 'Marginatus') for its lackluster cousin. Other interesting foliage plants, like the large-leafed Fittonias, feature either deep red veins (Mosaic Plant), or brilliant silver veins (Silver Net Plant).

Of course, entering the world of colorful foliage requires special attention to light exposure. Always select the proper plant for the proper location. For example, not all plants thrive in direct sun. Two varieties of Arrowhead vine (‘Emerald Gem' and ‘White Butterfly') are among the most beautiful trailing plants readily available. Given moisture and shade, they will thrive for years. But place them in too much light and they will literally fade away and die.

Location is not just a matter of sunlight and shade, however. One of the most intriguing hanging sedums, Burro's Tail (Sedum morganianum), has leaves or "pads" which are easily dislodged through handling. Such plants are best kept out of reach of children, pets, and tall human heads.

Hanging plants can offer colorful flowers in addition to exotic foliage. Christmas and Thanksgiving cactus are perhaps among the most used flowering indoor plants, although many garden centers also offer knock-outs like Lipstick vine (Aseschynathus radicans), which boasts profuse bright red tubular flowers, and Italian Bellflower (Campanula isophylla), an alpine perennial which does well in cooler indoor locations. One of the most unusual trailing plants is the Rat's-tail cactus (Aporocactus flagelliformis), an absolutely stunning cactus specimen with striking pink flowers. If you can recover from the unpalatable common name, you may find that this might be the only hanging plant you will ever need to impress friends and visitors.

Orchids, naturally, offer an amazing range of colors and growth habits, although they are a bit more temperamental than grape ivy. Devotees, nevertheless, will justifiably argue that the plants are worth all the extra care and attention. In fact, for sheer horticultural hubris, an upscale gardening concern offers an wrought-iron globe with built-in magnifier for displaying and viewing one's prized specimen.

On a more mundane level, bright kitchen windows provide an ideal environment for garden herbs. Culinary favorites like parsley, chives, and rosemary can do extremely well indoors, whether grown together as a miniature hanging garden or planted and cultivated separately.

The most important step you can take with hanging plants begins with selecting species most suited to your environment, including light, temperature, and humidity. But you should also select plants based on your personality. Choose something exotic, fun and different, if you enjoy caring for and exhibiting plants. If not, you can still add color and life to your living space by referring to the following list of dependable, time-proven favorites.

Copyright 2014, Joseph M. Keyser

Reliable Hanging Plant Species

Asparagus fern
Basket begonia (Begonia tuberhybrida pendula)
Baby's tears (Soleirolia soleirolii)
Christmas/Thanksgiving cactus
Creeping fig (Ficus pumila)
Devil's Ivy (Epipremnum pinnatum)
Ferns (numerous species)
Grape ivy (Cissus rhombifolia)
Hoya (Wax plant)
Ivy species
Kalanchoe
Lipstick vine (Aeschynanthus pulcher)
Philodendron species
Pothos species
Rosary vine or Hearts Entangled (Ceropegia woodii)
Spider plant (Chlorophytum comosum)
Swedish ivy (Plectranthus oertendahlii)
Wandering Jew

Wednesday, August 20, 2014

Paphs, Phals and Cats -- Oh My!

Orchids are perhaps the most exotic, breathtaking, and unique of all flowering plants. However, their frequent association with mist-shrouded jungle canopies has led many gardeners to think that growing them is beyond their everyday ability. Fortunately, you need not move to a remote tropical island or invest in a greenhouse to enjoy these fantastic jewels of nature.

If you can successfully grow indoor flowering plants, then you will happily find that there are scores of brilliant and affordable orchids to fit every situation and room in your home.

There are estimated to be between 30-40 thousand different species of orchids found in nature, and the incredible popularity of this plant family has led to the cloning and hybridization of more than a million different species. Finding the right plant to match the light level and wallpaper in your living room should not require a major expedition.

Over the years, orchid hobbyists and growers have found that several genera are quite easily grown under normal indoor conditions. For the most part, if you can provide lighting conditions similar to those required for African violets, such as bright east or west-facing windows, or a shaded southern window with no direct sun, you can provide a suitable light environment for most orchids. Even a sunny, southern exposure filtered with sheer curtains can be suitable for orchids requiring higher light levels.

Among the best plants for beginners with moderate light conditions are Phalaenopsis, Paphiopedilum, Miltonia and Miltoniopsis, with Paphiopedilum being the most tolerant of shady conditions, perhaps even a bright northern window. If somewhat brighter lighting conditions can be provided, prepare yourself for the showy and fragrant spectacle provided by Dendrobiums, Cattleyas, Oncidiums, and Brassias.

According to a survey by the American Orchid Society, the world’s largest plant society, Phalaenopsis have been selected as America’s favorite orchid, which is fitting as it is also considered to be the most easy to grow. Phalaenopsis are also known as moth orchids, because their sprays of wing-like blooms bear a striking resemblance to clusters of brilliantly colored moths perched upon a branch. Under proper indoor conditions, this native of tropical lowlands can provide blooms for up to eight months of the year, perhaps producing flower spikes twice each year.

Paphiopedilum are commonly called “Lady’s-slipper orchids,” thanks to their tell-tale flower “pouches,” and produce long lasting flowers along an upright spike or stem. The blooms themselves can last up to ten weeks and offer an array of pink, gold, white and lavender, often combined together in a single, stunning flower with darker shaded veins.

Cattleya are often larger plants with huge white, pink, or purple blossoms, traditionally thought of as corsage flowers. Generally larger “cats” will bloom once a year with flowers lasting up to three weeks, although some hybrids can last up to eight weeks under ideal conditions. However, the full-sized plant is often too large for most home conditions, and a generous number of miniature Cattleyas are available, often less than ten inches tall. The mini-cats are known to flower twice a year, with blooms lasting up to one month. Both large and small versions are fragrant when the blossom is fully open.

If fragrance is important, one of the most sweetly scented orchids is Oncidium 'Sharry Baby.' This prolific blooming plant is sometimes called – and marketed – as the "Chocolate Lover's Orchid." The one to two inch blooms, which can reportedly number over three hundred on a fully mature plant, are deep ruby red or mahogany and exude a rich and warm chocolate fragrance.

Brassias are among the most exotic looking orchids, although they are easy to grow and bring to flower, sometimes more than once a year. Commonly and aptly named the Spider Orchid, most of the popular hybrids produce hundreds of colorful spidery blooms on long, adventurous stems which can last up to one month.

Of course, there is more to raising any plant than simply picking out a pretty one and offering it a bright window. Remember that a large number of orchids come from tropical climates and prefer high humidity, usually anywhere from 50 to 60 percent or more, and sometimes up to 75 percent. Most homes usually remain in the 35-50 percent range during the winter.

In fact, with few exceptions, a great many orchid species are epiphytes, meaning that they live on or above a plant, usually in trees, and obtain moisture from the air itself or from rainfall running down the sides of their host plants. Short of hosing down your living room on a daily basis, potential orchid growers will have to increase the humidity around their plants using some form of humidity tray. Daily misting is generally not sufficient and is frequently impractical.

Perhaps the most simple type of humidity tray is a pan, even a cookie sheet, filled with pea gravel or pebbles. Orchids are placed on overturned saucers set atop the pebbles so that the orchid’s pot is never sitting in water. Water should be added to cover the pebbles on a regular basis, and replaced periodically. Evaporation from the pebbles will create a lush, humid environment around the plants, without turning the rest of your home into a sauna.

In addition to humidity, orchids will require watering and feeding. Remember that many of these tropical transplants are used to rain forest conditions, where they receive intermittent downpours, and so generally prefer a period where their growing medium is almost allowed to dry out between waterings. However, orchids should never be allowed to sit in soggy pots, which can lead to root rot and other diseases. Also, watering and misting should always take place in the morning, allowing leaves to dry before nightfall.

The growing medium itself is important. Many orchids are adapted to grow in soil-free conditions, which is why the majority of epiphytic species are cultivated in specialized orchid mixtures, usually consisting of varying grades of fir bark, poultry peat, perlite, and other additives. These beautiful tree huggers also obtain nutrients from debris washing over or falling onto their roots, and consequently will require frequent dilute feedings, from biweekly to monthly, depending on the individual plant and time of year.

Lastly, ensure that air can move around the plants readily, much like those balmy tropical breezes. Should you decide to keep a number of plants grouped together in a corner, you might want to consider using either a ceiling fan – or small tabletop fan – operating at a slow speed, just enough to keep the air circulating.

Naturally, the actual culture and care for each species of orchid is different with respect to potting media, feeding, humidity, and so forth, and you should rely on the careful directions which any conscientious grower or vendor will readily supply.

However, before ever purchasing that first, towering Dendrobium, canes waving aloft with large, brilliant sprays of flowers, you might want to contact an accomplished orchid grower or visit a public orchid show. You will discover that while there are many orchids perfect for your conditions, there are other genera, like Cymbidium, which simply require too much dedication and foster care.

Copyright 2014, Joseph M. Keyser

Biohazards in Your Basement!

Be it ever so humble, there's no place as deadly as home. Well, that's not strictly true, even though most accidents occur in the home, including most auto accidents taking place within five miles of home sweet home. What a deathtrap! But seriously, the fact is that most of us still spend a considerable part of every day indoors. Safely tucked away in the family room or kitchen, few of us realize that we are being exposed to a host of potentially harmful biological pollutants, which in varying cases can cause mild discomfort, often confused with a simple lingering cold, or more severe illnesses with long-range health complications.

Looking around our homes, it might be hard to imagine that our pets, humidifiers, and carpeting can represent sources for biological contamination. In fact, for most people a damp towel or face cloth or a soggy bath mat produces nothing more than a sour smell, and
"contamination" is an extreme way of viewing that spot of unsightly mildew in the shower stall. However, many other individuals are highly susceptible to these pollutants, including the elderly, young children, pregnant women, and people with respiratory problems such as
asthma, chronic allergies, and lung disease. For this at-risk community, biological pollutants deserve both attention and corrective action.

Contributors to contamination

Many of the causes of biological pollution are hard to avoid, even in the cleanest homes, and include everyday activities like cooking and showering, which result in the high moisture levels conducive to the spread and growth of mold, mildew, dust mites, and other unwanted guests, all of which can, in turn, lead to health complications. In fact, the "moisture connection" is one of the most widespread causes for contamination, although it is one of the easiest to remedy.

Among the other common sources are pollen, infectious agents like bacteria and viruses, microscopic dust mites living on household dust, cat saliva and other pet dander -- the tiny or microscopic scales from skin, hair and fur, and feathers. Macroscopic and generally hated agents include mice and rats, especially their protein-rich urine, and numerous insect pests. Cockroaches are bad enough, but even microscopic "flakes" from their dead bodies can cause significant distress for some people.

Allergists and respiratory specialists generally look at several major categories of health problems related to biological pollution, including allergic, infectious, and toxic reactions, although many are interrelated, especially as conditions favorable to one problem are advantageous to others, particularly where moisture, warmth, and humidity are involved.

An allergy is basically the immune system's response to an unwanted foreign substance or allergen, such as pollen or pet dander. In sensitive individuals, this response goes well beyond sniffling and sneezing and can take the form of a severe and even life-threatening overreaction. Upon entering the body, allergens prompt the body's immune system to produce millions of antibodies which attach themselves to cells throughout the body, ready and waiting for another "invasion" by that specific substance. When the allergen is detected, the antibodies trigger the cells to release chemicals called histamines to help destroy the allergens, although the allergic reaction can often pose more of a health threat than the allergen itself.

Infectious reactions or diseases are the handiwork of bacteria and viruses, and are easily spread via contaminated countertops, improperly cleaned cooking utensils, and through the air from person to person. Bacteria and viruses can also be brought into the home from the outdoors on dirty shoes or soiled clothing, or even by bringing plants inside from a garden or patio. Airborne diseases, which can also be spread via some ventilation systems, have also demonstrated a much higher viability in moist environments where they can survive until meeting up with a new host -- or victim.

Toxic reactions have started to receive a great deal more attention as discussions mount regarding sick building syndrome. Among the best known example is humidifier fever, brought about by toxins released by microorganisms and fungi thriving in poorly maintained or designed heating and cooling systems, both in large commercial properties and in some typical residential systems and home humidifier units.

Drying Out
While increased cleanliness, better cleaning habits, and air filters can help control some of the particulate contaminants in the home, there is no doubt that water and moisture play perhaps the most significant role in creating biological pollution. Standing or stagnant water, or water-damaged materials (wood, wallboard, carpeting or carpet pads) are breeding grounds for insects, bacteria, and other pests. Cold exterior wall surfaces, especially inside closets or behind furniture and bookcases, can experience condensation, thereby triggering fungal outbreaks of mold and mildew, along with their attendant allergens and toxins. And warm, moist conditions are ideal for dust mites, which represent a one of the most ubiquitous and potent allergens in most homes.

Unfortunately, this "muggy" indoor environment is fairly much the norm in the northern part of the U.S., where studies cited by the American Lung Association found that approximately 30-50 percent of all homes and large structures demonstrate a high relative humidity -- exceeding 50 percent. In addition, research found other signs of periodic dampness in these homes, often resulting from seasonal flooding, leaks, and so on.

Making Your Home Healthier
To prevent the rash of problems likely to result in a tropical household, the Environmental Protection Agency recommends that relative humidity be controlled to 30-50 percent, and that remedial steps be taken to better manage other sources of moisture. The following is a room-by-room recipe for a healthier home.

Basement: If carpeting is used on a concrete floor, install a vapor barrier (basically a plastic sheeting) to keep moisture from entering the carpet backing and fibers. Clean and dry water-damaged carpets within one day -- or consider replacing the carpet. Also, it might be advisable to simply use another flooring surface or removable area rugs. Check for and repair any sources of leaks or water damage, especially around windows and exterior stairwells. Increase air circulation and consider using a dehumidifier in damp sublevels, and be sure to frequently drain (every day) and clean the "evaporation tray" or collection reservoir.

Kitchen: Install and use an exhaust fan -- or at least open a window -- when cooking, hand-washing dishes, or using a dishwasher, etc., to vent moisture to the outdoors. Do not rely on the all-too-common rangetop hoods which simply filter cooking particulates. Periodically check, empty, and thoroughly clean refrigerator drip pans; check for moldy gaskets and clean or replace them. Carefully clean all food preparation areas and utensils. However, exercise caution when using various cleaning products; do not mix different types of cleaning agents. Consider using an effective organic or botanically-derived alternative. Clean and rinse sponges and frequently change dish towels since disease pathogens are sometimes spread by cleaning with contaminated cleaning aids; use a different sponge for each different cleaning chore. Clean all damp surfaces in the kitchen.

Utility Room: Vent dryers and consider using an exhaust fan when washing laundry. "Air dry" wet laundry outdoors.

Bathrooms: Use an exhaust fan to vent moisture or open a window. Replace and clean towels and bathmats regularly. Clean and dry surface areas thoroughly; use the same amount care as with kitchen sanitation, especially since many bathroom cleaners contain caustic chemicals and release harmful vapors. Remove, vigorously clean, or replace moldy shower or window curtains.

Bedrooms: Individuals with a low tolerance for dust and dander should avoid down-filled pillows and comforters, and should use allergenic-proof mattress pads, as well as foam rubber and other synthetic bedding materials. Further, bedclothes should be frequently laundered with hot water reaching 130 degrees or more.

Attics and Crawl Spaces: Check areas for leaks or water damage, provide exterior venting and improve air circulation. Cover the dirt "flooring" of crawl spaces under the house with a vapor barrier to keep out moisture and control pest infiltration.

General Household: Improve overall air circulation by ensuring that fresh air can enter the house via air exchangers or by opening windows; move furniture away from exterior walls; and leave doors into rooms partially open most of the time, including closet doors -- paying special attention to closets with exterior walls. Remove all traces of mold through cleaning; do not simply paint or wallpaper over damaged areas. Change or clean air filters for heating and cooling systems regularly, including window air conditioners, whose evaporation trays should also be examined and cleaned periodically. If a central humidifier is being used, carefully observe the recommended maintenance schedule; with portable units, change water as directed and clean all water-contact surfaces. Dusting and vacuuming can be torture for sensitive individuals, as the act of cleaning often stirs up a universe of mite allergens and other contaminants. Highly allergic people should leave areas (or homes) being cleaned; others should wear a protective mask, and use a dampened cloth or sponge-mop for cleaning. Vacuum and dust often to remove surface dust and reduce dust mite habitat. A central vacuum system is advisable for the acutely sensitive, although rather costly. Other extreme measures can include replacing wall-to-wall carpeting with washable area rugs and replace window blinds or delicate shades with washable curtains.

Copyright 2014, Joseph M. Keyser

Monday, August 18, 2014

Tut, Tut: The Secrets of Papyrus

In recent years, ornamental grasses have become de rigueur for most modern garden designs. They are graceful, tall, and elegant – rather much the Audrey Hepburn of horticulture. But how can we translate this vertical effect to our indoor gardening environment? The solution comes replete with a rich and stunning history dating back to the ancient Nile, Pharaohs, Egyptian gods, and Moses in the bulrushes. Welcome to papyrus, one of the most important plants in early human civilization.

Papyrus (Cyperus papyrus), is undoubtedly the most famous member of the genus Cyperus (kupeiros is Greek for sedge), which is comprised of some 4,000 to 5,000 species, several of which are well-suited for indoor and outdoor pond gardens. The species name papyrus derives from the Egyptian word meaning “that which belongs to the house,” where house alludes to the ancient ruling body or bureaucracy.

Papyrus is, of course, the source for our word paper, and was also the plant used to produce sheets of paper for thousands of years, beginning as early as 4,000 BC. In fact, a thriving and vital trade existed for this writing material until about the third century AD, when it was found easier to produce paper from plant pulp, in a process introduced into the Middle East from China via Arab traders. Papyrus-paper also faced competition from Europe and the Near East in the form of parchment or vellum, which was made from animal skins, such as calf or sheep (hence getting your diploma or “sheepskin”). Papyrus continued to be manufactured and used in ever-decreasing amounts until the 11th century.

Interestingly, the plant itself all but disappeared from Egypt during the 20th century, due to dams on the Nile and other unsustainable practices. The plants were reintroduced into the area around Cairo from thriving native plant stock in Ethiopia and the Sudan in the late 1960s by Dr. Hassan Ragab, an Egyptian inventor and scientist, who also rediscovered a method for creating papyrus, which has now reemerged as a high-end novelty product and specialty paper.

Papyrus was, however, much more than an everyday paper product. Ancient Egyptians would also use the soft pith of the stem as a foodstuff, cooked and processed like sugar cane, or eaten raw. Ancient pharmacologists, like Galen and Dioscorides, cataloged a wide variety of medicinal uses for infusions made from the plant. Egyptians also harvested and dried the woody rhizomes and culms to use as a fuel – whose ashes were also medicinal! Garlands were woven from the graceful flower heads to adorn the shrines of the gods, and for funeral observances. The stylized representation of the papyrus inflorescence, or umbel, is a central motif in the art of the period, akin to the lotus motif in Eastern art. Fibrous strands taken from the stem of the plant were used to weave sandals, ropes, plaited fans, mats, wrapping materials, and to produce, oh yes, baskets.

Lest we forget, the basket into which Mariam and Jochebed placed the infant Moses to escape the infanticide decree of Pharaoh was woven from papyrus stems. And, as you think of sister Mariam watching the basket float along the Nile and nestle into the bulrushes, keep in mind that bulrush is but another common name for papyrus. Holy Moses!

Today, papyrus can find a ready welcome far from the subtropical banks of the Nile, especially as there are closely related species of sedge which can readily fit into a water garden, pond, or even into an attractive indoor container. Actually, the true papyrus species is overwhelming, and might be more bulrush than you can handle. Under ideal conditions, Cyperus papyrus can grow between 12 and 15 feet tall, with stems approaching six inches in diameter, although most gardeners report that indoors the plant only reaches eight feet. Still, that might be a bit much for the average family room. And don’t forget that all of the papyrus-like species originated in tropical and subtropical climes, and will need to be relocated indoors before the first frost.

A species suitable for the average backyard water feature is dwarf papyrus or miniature cyperus (Cyperus prolifer), which will stay upright and well-ordered at no more than 12 to 36 inches. Like most Cyperus, the plant thrives in full sun and likes to sit in water. Pretty ideal, having a plant that cannot be overwatered! This species can also take light to partial shade in the yard, or will purr happily in a sunny indoor window.

Pygmy Egyptian papyrus (C. haspan) has a sparkling appearance much like a bright green feather duster. It will top out at about 18 inches, and feels at home in a pot filled with a rich, loose soil mix, which is then placed in a second larger container filled with water – or set into an outdoor pond.

My personal favorite Cyperus species actually hails from Madagascar, and while it bears some overall resemblance to papyrus, its leaves are thicker and lie in a flat plane, which easily led to its common name, umbrella plant (C. alternifolius).

Umbrella plant can grow to five feet or more indoors, and slightly larger outdoors, although three to five feet is more common. Another sedge, it has a triangular stem, whose shape lends structure support to keep the stem upright in strong winds, perhaps faring better than the average umbrella. It also loves to sit in water day after day.

In fact, many of us who fancy the plant actually grow it in nothing more than a cachepot or sealed container filled with water, and lined with rocks on the bottom to help stabilize plant roots. In this hydroponic setting, it’s important to fertilize somewhat regularly, especially during active growing and flowering periods. But don’t mind the flowers: nothing much exciting there, mostly a bland, tan, oat-shaped affair.

Like most sedges, umbrella plants can be propagated by dividing the substantial root masses or clumps of rhizomes, keeping the outer, younger sections for replanting, and composting the older core. Although a much more entertaining method, of which I have not tired in more than 20 years, calls for cutting off the top six inches of a stem of the plant, leaves and all, and inverting the whole into a glass or vase of water. After a few weeks, roots will form around the junction of leaves and stem, and new shoots will emerge growing up, out of the water. When well-established, carefully plant the rooted cutting into a loose soil mix and keep well watered – or immersed. You can also continue to let the plant grow in water alone.

For the record, several plants gracing the bookcases in my office are descendants from several cuttings given to me in 1979. They have, over the years, produced huge clumps of plants for my rooftop garden, and smaller, discrete potted specimens for windowsills. Scores have been propagated and given to friends and curious visitors. And the tradition lives on.

Like the Egyptian papyrus alternatives, umbrella plants are available in compact and dwarf varieties, such as sparkler grass (C. alternifolius gracilis) under 18 inches with delicate, narrow leaves, as well as in a related variegated form (C. diffusus variegatus), where both leaves and stems are striped with a touch of creamy white against a wide, light green leaf.

Whether you’re striking out to honor Osiris, or print your own Book of the Dead on homemade papyrus, or maybe just add a little excitement to your parlor window with a dwarf ‘Nana’ umbrella plant, you can find just the right plant through online sources year-round, while many fine garden centers sell potted specimens in their water garden section.

Copyright 2014, Joseph M. Keyser

Friday, August 15, 2014

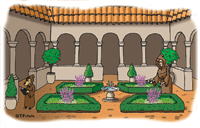
Getting Close to Cloisters

A garden can play many roles in our lives, depending on its design and intent: a treat for the senses, a source of sustenance, or a simple place to mess about with plants. But certainly one of the most important and traditional roles is as a unique place away from the world and worldly concerns. This special sort of garden can serve as an area for reflection, meditation, and spiritual healing. Indeed, for many of us, while we acknowledge having lost Eden, we haven’t given up on trying to recreate an ideal space for body and soul.

Perhaps no finer model for this meditation garden exists than the great monastic gardens which flourished for more than a millennium. By their very nature, these cloistered gardens were physically separated from the outside world by walls and roofed arcades, allowing visitors to focus within: both on the inner features of this peaceful garden, with its tranquil fountain, fruit trees, and healing herbs – and, more importantly, within themselves.

In fact, the very act of enclosing a garden reflects an almost primal understanding of what a garden is. For fun with philology, we can look to the etymology of “garden” and find the proto Indo-European root word “ghor-dho,” which means “enclosure.” (That word is also related to “yard” and the Latin hortus, as in horticulture.) Perhaps more interesting, medieval cloistered gardens were often called paradise gardens, hearkening back to Eden, with the word “paradise” coming to the West as pairidaeza, from the Old Persian, also meaning “walled enclosure.” The West, after all, did not have a monopoly on enclosed gardens.

To create a true garden meant separating your plants – and your person – from the world outside. And as our world is no more peaceful than that of the abbots who created the Benedictine and Cistercian monasteries, perhaps we might just want to return to the notion of a cloistered garden of our own.

Naturally, your three bedroom colonial might not easily lend itself to the addition of a finely cut stone-walled quadrangle, but you can at least separate your meditative space from the rest of your landscape with a simple wooden fence, trellises, arbors, or a planting of shrubs. You’re simply looking for a private inner space where you can turn within.

Following the lead of the monastic gardens, which typically observed a formal layout of rectangular beds and pathways, you might want to establish raised beds, another common medieval feature, in which to cultivate herbs and vegetables. After all, St. Benedict in the 6th century required that his monks provide all their own “necessaries” within the walls of their monastery. Not unlike the Victory Gardens of the 1940s.

Herbs were especially important to the monastic garden, as any fan of the Brother Cadfael mysteries knows. Medicinal plants were at the heart of monastic life, where monks studied and recorded the therapeutic properties of roots, dried leaves, and fruits, thereby institutionalizing modern pharmacology, much as the abbeys laid the groundwork for hospitals. Consider a quick visit to a public herb garden to identify medicinal and other herbs for your garden. You will be surprised that key medieval herbs are still favorites today.

Fruit trees, another symbol of paradise (munching on which led to man’s expulsion), were common features in almost all medieval gardens, and might adorn your garden, as well. Of course, barring the presence of a serpent, you should feel free to enjoy any of the apples or plums that you grow.

And while planning your bit of backyard paradise, remember that fragrance can stir memory and reflection, much as incense is used in both Eastern and Western religious traditions. Depending on your taste, you might plant soft musky-scented English boxwoods as a formal edge to your pathways, or choose from the palette of native shrubs and vines such as buttonbush or arbor-loving virgin’s bower.

The center of your garden should host a single, strong element, whether a trickling fountain, birdbath, or piece of sculpture. Original medieval works are probably out of the question, but concrete knock-offs of the Irish St. Fiacre (patron saint of gardeners) can be found in various garden shops, especially those associated with cathedrals, naturally.

Lastly, remember to set aside an area where you can actually sit and enjoy – and use – your meditation garden. That means setting aside time as well. The world goes along in its bumpy chaotic way, but you can still find a peaceful retreat and solace for your soul in paradise, even if it’s only in your backyard.

A personal note on cloistered gardens:
I strongly believe that at one time or other, nearly everyone has been profoundly influenced by a special place or an experience of place. For a young kid from Brooklyn, that place was the Cloisters in New York, the Metropolitan Museum of Art’s world-renowned and truly staggering collection of medieval art. The Cloisters is a museum woven around five actual monastic gardens disassembled and reassembled stone-by-stone in Ft. Tryon Park, overlooking the Hudson River. At around age 12, I experienced the Cloisters for the first time with my father one late winter’s day. I remember the scent of lemon and orange blossoms from potted trees dotting the glass-screened arcades; the burbling sound of fountains competing with Gregorian chant echoing through the complex. That single visit ultimately led to my educational life as a medievalist, my vocation as a horticulturist, and created a cultural passion that informs each and every moment of my life. Today, my wife (a medievalist) and I are on the verge of planning the construction of my dream home: it will have bedrooms, a kitchen, library, and all the rest – and it will be built around a central courtyard, a garden, with herbs and fruit trees and fountains. Evidently some places change you forever.

Copyright 2014, Joseph M. Keyser

Wednesday, August 13, 2014

Bamboozled by Bambusa

A common axiom in gardening is putting the right plant in the right place. Where bamboo is concerned, most people think that the only appropriate location is somewhere on the far side of hell. Bamboo is cherished and ardently defended as a vigorous landscape screen by some, although it is usually cursed as an invasive, unstoppable menace by most others, especially irate neighbors who find spikes and spears shooting up in their lawn and garden beds.

There are more than 750 species of bamboo plants which have been introduced to North America from Asia, the Caribbean, and Latin America. Most of these woody grasses (yes, they are actually grasses!) fall within the genera Bambusa, Pseudosasa, and Phyllostachys, and are renowned for growing upwards of 16 to 40 feet, with a cane or “culm” diameter ranging from one to six inches. Many also experience a general die-back after about a dozen years, usually after flowering, which will leave a dead, yellowed bamboo jungle, until new growth repopulates the grove.

Some species are considered “clumping,” which are generally well-behaved, while the more insidious specimens are called “running bamboos,” which will swiftly produce an impenetrable and monocultural thicket as they exert their own manifest destiny. Among the most commonly sold, planted, and (ultimately) loathed of runners is Golden Bamboo (Phyllostachys aurea).

These exotic invasive bamboos have caused feuds just shy of the infamous Hatfield and McCoy dust-up. Lawsuits have been filed, bulldozers mobilized, and concrete barriers poured. And yet, for all that, people looking to screen their yards from neighbors continue to plant running bamboos, especially in narrow spaces between properties or along fence lines.

Happily, there are attractive and non-invasive alternatives to bamboo blight, but first we should address how best to control and eradicate these invaders.

To keep bamboos from running, a rhizome barrier should be used. Bamboos very seldom produce seeds, and use rhizomes, or horizontal underground roots, to spread outward. To stop this march, a barrier two-three feet deep is essential, with about two inches rising above the soil surface. Slant the barrier outward near the top to ensure that rhizomes hitting your blockade will grow upward, and not down and eventually under the barrier. Keep an eye out and cut off any roots that attempt to grow over the top. Barriers can be made from metal or concrete, although heavy 60 mil plastic is the most readily available and affordable.

Clumps of bamboo can also be dug out, as the roots are actually quite shallow. Be sure to remove any and all pieces of the rootstock, including wayward rhizomes, and keep an eye out for future incursions.

A somewhat easier approach is to cut bamboo shoots as close to the ground as possible, and thereafter snip or mow down any new shoots or pesky regrowth. Eventually, you will starve the rootstock and the plant will die, although you will need to patrol the area on a regular basis for a year or so. This technique is best used on bamboo entering your yard from a neighboring property. In fact, some homeowners simply mow down any shoots in their lawns when they cut their grass, and have seen thumb-thick shoots eventually replaced by pencil-thin sprouts, just before they disappear altogether.

For quicker, more thorough results, Jan Ferrigan, an invasive plant program manager in Virginia, recommends cutting down bamboo shoots and applying Roundup or a similar glyphosate herbicide directly inside the now-open stem, and painting the outer surface of the culm. Jan suggests carefully using the herbicide at a 25 percent concentrated solution, not the typically diluted two percent used for routine spraying. And fall is the usually recommended time for application.

Naturally, the best solution is not to plant exotic bamboos at all. And the finest alternative is, not surprisingly, a native bamboo. Generally called canebrake bamboo (Arundinaria gigantea), or southern cane, this species used to cover enormous stretches of riparian “bottom land” from the mid-Atlantic to the Midwest prairies, down through the southeast, and along the Gulf states. Amazingly, before European colonization, native Americans lived among canebrake groves several miles in width, running up to 100 miles in length. Today, there are only scattered patches of these lush thickets.

Homeowners looking for a tall, dense, yet elegant, living fence need look no further. Canebrake can reach 12 to 18 feet or more, with half- to three-quarter inch canes and medium to dark green foliage year-round. However, when shopping around, don’t confuse this species with switch cane (A. tecta), which is smaller, low growing, and more suited as a groundcover plant. And while very few garden centers and nurseries seem to carry canebrake, there are numerous sources online and through mail-order catalogs, with prices ranging from 15 to 25 dollars for one and two gallon containers.

Not interested in bamboo at all? Consider arborvitae (Thuja occidentalis) as an alternate evergreen screen. The cultivar Emerald Green is probably the most popular of standard arborvitae, growing 15-20 feet, with a spread of four-six feet. Its lustrous gem-green foliage is tolerant of cold winters and hot summers, although, as a native of the northeast, it would prefer to be watered during dry periods, and mulched three to four inches deep to retain soil moisture.

Emerald Green can be pruned if or as desired in early spring, and is often considered superior to the much overused Leyland cypress, which could also work as a screen, although it can reach 60 feet and would require substantial pruning to achieve the same effect. Other desirable cultivars include both ‘Nigra,’ which remains dark green even through the winter, featuring a pyramidal form reaching 15-25 feet and five-eight feet wide, and ‘Pyramidalis,’ with softer, bright green needles, growing to 15 feet with a four foot spread.

Another clear winner is Irish juniper (Juniperus communis ‘Hibernica’) with bluish-green foliage, and a columnar form reaching 10-12 feet. This juniper is drought tolerant, with dense upright branches. Some nurseries indicate that it can reach 15 feet with only a narrow two-four foot spread.

There are also numerous species of yews suitable for narrow space screening. All are able to handle heavy pruning and shaping, and contrast their dark green foliage with bright, fleshy red or yellowish-red berries, called arils.

Perhaps most prized of all is Irish yew (Taxus baccata ‘Fastigiata’), which is actually an English or common yew, easily growing from 15-30 feet tall, with a four-eight foot spread. [It is the most commonly grown species in Europe, and has been in use for well over 200 years.] The needles are a striking blackish-green, although other cultivars, such as ‘Fastigiata Aurea,’ while similar in form, actually feature golden foliage on its new spring growth.

Japanese Yews (Taxus cuspidata) generally tend to have a broader spread and lower growth habit, and often quite a slow growth rate. However, cross Japanese and English yews and you’ll find a hybrid (Taxus x media) showcasing some of the best assets of each parent. Many of the outstanding cultivars for living screens were developed or discovered on my native Long Island, including several by famed nurseryman Henry Hicks. The specimen bearing his name, Hicks yew (Taxus x media ‘Hicksii’), is columnar in form, 12-20 feet high, and six-ten feet across, with glossy needles, deep green on top and a pale green underneath.

Lastly, Eastern hemlock (Tsuga canadenensis) has long be valued for its light, airy needles and graceful branches, which readily accommodate heavy pruning to create a lush, dense hedge. Left on its own, however, the tree will reach 60 feet with wider spaced branches.

Copyright 2014, Joseph M. Keyser

Monday, August 11, 2014

RainScapes! Harvesting the Heavens

For imaginative landscapers, rain gardens may represent the perfect marriage of heaven and earth. Specially-designed garden areas help to receive and store rainfall, using that moisture to nourish an oasis of interesting native plant communities reminiscent of lush stream banks and freshwater marshes.

The notion of developing rain gardens has received a lot of attention across the country. Jurisdictions from Seattle, Washington, to Montgomery County, Maryland (and thousands in-between), have made considerable progress in developing “bioretention” structures to control the quantity and quality of stormwater runoff, seeing rain gardens as attractive, cost-effective options to curbside storm drains and large stormwater ponds.

In essence, rain gardens function like miniature wetlands. Rainwater from paved surfaces and downspouts is directed to a low-lying garden area which allows the water to be stored temporarily until it is absorbed by the plants and soil. Any pollutants, such as fertilizer, pesticide residue, or even oil, grease, and heavy metals from roadways, are effectively trapped by the rich organic soil and root systems in the garden, permitting clean water to slowly soak down through the soil and rocky subsoil until it “recharges” groundwater supplies.

Sophisticated rain gardens are designed to accommodate all of the rainwater from a surrounding area: rooftop, driveways, walkways, and so on. Moreover, a true rain garden is developed with consideration for existing soil types, and often includes underdrain systems, in addition to lasagna-like layers of gravel, landscape fabric, sand, and amended soil. However, while effective, the bonafide approach is complicated and relatively expensive. And most homeowners do not have the stomach for bringing earth moving equipment into their backyards and turning 60 percent of their landscape into a stormwater marsh.

Fortunately, many of the features and benefits of a carefully engineered rain garden can be employed by backyard gardeners willing to give up a bit of lawn in favor of a colorful, low maintenance backyard habitat.

A basic approach might be to identify at least one downspout which can be redirected toward an area which slopes gradually away from your home. Keep the rain garden at least 15 feet away from the building, and ensure that all water flows away from the house to prevent dampness or flooding in your basement.

Layout your garden on the gentle slope, preferably in an irregular shape, such as a kidney bean or round-cornered crescent. Use an old hose to help create an attractive outline and start removing the top layer of turf and soil. For your garden to effectively capture runoff, dig down on an angle to about one foot. Most of the material you remove can be used to build up or “berm” the sides of the garden.

The next step is the most crucial. Your goal is to create an area which will act like a sponge to soak up hundreds of gallons of rainwater. Local heavy clay soils will never function properly, and you will need to amend or replace the clay with compost – and lots of it. You can use the compost by itself, or mix it with topsoil and even some of the soil you have excavated. You might also want to add well- rotted leaves to the mix.

Flexible downspouts can deliver water to your garden, or you might bury corrugated drainage pipe in a trench and bring it to within one or two feet of the garden. It is important to allow rainwater to run over a grassy area or planted buffer before reaching the garden. You do not want a surge of rainwater to start eroding soils and washing away mulch.

Planting is, of course, the fun part of the process. But before planting, let your garden handle several rainstorms first, to ensure that your soil amendments have settled appropriately, and to guarantee that water will not pond in the garden more than three days. If done properly, excess rainfall will flow over the garden and continue across your lawn, and water “harvested” by the garden will be absorbed within 24 hours. If water ponds for three days or more, you will need to improve the soil with more organic amendments and possibly lower the downslope side of the garden to improve runoff.

The plants you select for your rain garden are often unlike those used in conventional settings. Native perennials that enjoy moist and even saturated soils will thrive in your garden, and will encourage visitation by butterflies, hummingbirds, and other nectar and berry feeders. Your pallette can include swamp milkweed, columbine and asters, ironweed, lobelia, blue flag, bluebells and bluestem grasses, bee balm, ferns, sedges and switchgrass, boneset, gentians, liatris, and much more.

Many of these natives are now sold by local nurseries, where experienced horticultural staff can help match suitable plants with your rain garden needs. You will need to consider sun or shade exposure, how moist your garden soil is and the duration of wetness, and also think about how well your plant selections can tolerate drought periods. And, after planting, be sure to mulch your garden to save every drop of precious rainwater.
For more information about rain gardens, be sure to check out my former website (now under different management): RainScapes.org.
Copyright 2014, Joseph M. Keyser

Friday, August 08, 2014

A Closer Look at Commercial Landscapes

Maintaining healthy turf areas around most commercial properties requires a considerable investment of time and resources. Moreover, those lawns also produce a prodigious amount of clippings that must be recycled, either through the preferable practice of grasscycling, or by transporting clippings to an appropriate recycling facility, which is also an expensive proposition.

Fortunately, a growing number of property managers are learning that selecting alternatives to landscaping with grass leads to both long-term savings and to exceptional aesthetic values — which can be seen as an investment in advertising: visually separating that colorful, creative site from the boring sea of grass around them.

Excellent examples of departures from lawn-only landscapes can be seen in the District of Columbia, where projects sponsored by the Federal Reserve and Pennsylvania Avenue Development Authority called in the landscape-pioneering firm of Oehme and Van Sweden to install traffic-stopping plantings of dramatic ornamental grasses, native wildflowers, colorful perennials, and assorted ground covers. There were even some spaces where small lawn areas were used to contrast with the bolder plant materials — but they were very small.

There are horticultural and environmental benefits to altering traditional landscape designs. From a tree-care perspective, it is important to realize that one of the most common causes for tree mortality is disease resulting from injuries to bark and shallow surface roots — almost universally inflicted by lawn mowers and trimming equipment. Replacing turf under trees with wood or leaf mulch, or replanting with low to no-maintenance ground covers, eliminates these injuries and the costly need to replace specimen trees — in addition to paying for the removal and recycling of a dead tree. Lawn care needs are also reduced, whether in terms of mowing, aerating, fertilizing, or irrigating.

Moreover, property managers have often commented on the difficulty of keeping grass growing vigorously under the shade of a mature tree. In fact, grass generally needs more light than is ordinarily found in full shade; turf plots under trees should be replaced with shade-loving ground covers or mulch. Consider also that grass roots aggressively and too-successfully compete with trees for moisture and nutrients. During drought periods, trees can suffer from this stress and decline in health or perhaps even die. Replacing grass with any of the scores of ground covers commonly available will eliminate trouble areas in the landscape, improve tree health, and add color and beauty to your site.

Replacing grass with mulch islands and perennial plantings or sun-loving ground covers is especially important along curbs, streets, streams, and other watershed areas. These alternate plantings can serve as valuable buffers to prevent erosion and the run-off of lawn fertilizers and other chemicals. Plantings along curbs or streets also serve to frame your landscape, present color to the eye immediately, and then draw the visitor's eye to your company's building. Again, nibbling away at turf areas will ultimately reduce the amount of lawn care required, while the "frame" effect will make remaining turf areas more attractive overall.

Combining plantings along pathways, site perimeters, and parking lots with ground cover plantings under trees, will add a level of sophistication and elegance to your landscape — and your corporate image — which is generally lacking in sites carpeted with grass from curb to foundation. And the new design will soon pay for itself as the more intensive needs of turf management and recycling grass clippings are diminished.

There are several other practical benefits which accrue from landscape alteration: expanding areas utilizing ground covers creates a "organic sink" which eliminates the need to recycle some of your yard trim materials. Leaves can be allowed to fall under trees in autumn and remain there: earthworms and bacteria will work year-round to convert those materials into organic nutrients which will themselves continue to nurture and enhance the health of trees and ground covers alike, without additional fertilizer applications!

Augmenting your need for mulches under trees and in mulch island plantings also provides a "sink" for leaves and brush which can be readily shred into mulch or composted on site, eliminating the need to transport those materials to an off-site recycling facility. Furthermore, your landscape will benefit as your management regimen shifts to incorporate as much organic material as possible, saving you the cost for expensive soil amendments and fertilizers, and naturally revitalizing the soil in lawn and garden areas.

Using grass in a landscape has its place, but consideration should be given to how much turf is really necessary — if any at all — and how much does it cost to maintain that lawn. Reducing lawn area reduces expense, reduces solid waste generation, increases natural beauty and thereby enhances corporate image.

Lastly, the transition away from turf need not take place overnight: a phase-in period can be developed which favorably balances plant and mulch installation costs against maintenance and recycling costs, leading to property management cost savings — and ultimately leading to a sustainable and healthy environment for employees, customers, and your surrounding community.

Copyright 2014, Joseph M. Keyser

Hardy and Reliable Native Plants for Sunny Locations

Herbacious Perennials

Wild columbine (Aquilegia canadensis)
Common milkweed (Asclepias syriaca)
Butterfly weed (Asclepias tuberosa)
White wood aster (Aster divaricatus)
New England aster (Aster novae-angliae)
False blue indigo (Baptisia australis)
Wild indigo (Baptisia tinctoria)
Tickseed Sunflower (Coreopsis tinctoria)
Threadleaf coreopsis (Coreopsis verticillata)
Hay-scented fern (Dennstaedtia punctilobula)
Purple coneflower (Echinacea purpurea)
Joe pye weed (Eupatorium fistulosum)
Oxeye sunflower (Heliopsis helianthoides)
Grass-leaf blazing star (Liatris graminfolia)
Gayfeather (Liatris spicata)
Wild bergamot (Monarda fistulosa)
Horsemint (Monarda punctata)
Sundrops (Oenothera perennis)
Beardtongue (Penstemon digitalis)
Moss phlox (Phlox subulata)
Obedient plant (Physostegia virginiana)
Early coneflower (Rudbeckia fulgida)
Black-eyed susan (Rudbeckia hirta)
Fire pink (Silene virginica)
Rigid goldenrod (Solidago rigida)
Wrinkle-leaf goldenrod (Solidago rugosa)
Showy goldenrod (Solidago speciosa)
Bird’s foot violet (Viola pedata)

Native Grasses

Big Bluestem (Andropogon gerardii)
Broomsedge (Andropogon virginicus)
Canada wild rye (Elymus canadensis)
Bottlebrush Grass (Elymus hystrix)
Virginia Wild Rye (Elymus virginicus)
Switchgrass (Panicum virgatum)
Little bluestem (Schizachyrium scoparium)

Tuesday, August 05, 2014

Wising Up to a Water-wise Landscape

As I edit this article, the only flowing water in the western part of the U.S. seems to be a watermain break at UCLA.  Otherwise, it's a desert out there -- and not just where there's always been desert.  But drought is a common problem for much of the country.  During the hottest summer months, our lawns and gardens face a number of environmental challenges which threaten their health and beauty. Wilting and discoloration of lawns and foliage is a common example, as are flowers dropping buds, or tomatoes succumbing to blossom-end rot. And yet these symptoms also herald additional complications, as voracious insect pests and fungal diseases find an easy prey in plants under stress. The root of the problem is soil moisture and whether plants are getting enough to drink during cloudless, 90 degree days.

The solution to dry soils and drought, however, is not simply to run a hose and run up a huge water bill. Watering is very often the most wasteful and expensive of solutions -- with improper watering or overwatering leading to even more short and long-term problems for the landscape. To keep your corner of the globe green, it is best to become water-wise.

Liquid Lawn Care

Lawns are the dominant part of most landscapes. Grass is easy to put in, especially over a large area, but keeping grass green and lush is another story. Lawns are notorious water hogs, with most doting homeowners applying much more water than a lawn really needs, often squandering as much as 100,000 gallons on a typical quarter-acre suburban lot. Fortunately, there are a number of simple water-wise practices that can actually improve the health of your lawn, while saving money, time, and tens of thousands of gallons of precious water.

Stop watering. Although it sounds like lawn care heresy, most grasses (except bluegrass) can safely be allowed to enter a period of dormancy during the driest part of the summer. In fact, dormancy is a natural mechanism to help grass survive drought and heat. Your lawn will recover with the return of rain and cooler temperatures.

Stop fertilizing. The worst possible time in the year to apply fertilizer is in the summer. That jolt of nutrient pushes grass plants to grow unsustainably, risking health and vigor, and interrupting root development when it is most needed. Wait until fall before even thinking about fertilizing.

Grasscycle. Let grass clippings remain on the lawn when you mow, and cut your grass no lower than 3 inches. Clippings are over 90 percent water, and, as they filter to the soil surface, they provide a temporary layer of mulch to conserve soil moisture; taller grass also shades the soil, reducing surface heat and evaporation.

Watering do's and don'ts. If you must water, do it right. Water only in the early morning, never during the day or in the evening; improper watering can lead to fungal diseases or scalded foliage. Do not water on windy days, as breezes only hasten evaporation. Do not water driveways, streets or sidewalks; in addition to wasting water, runoff entering stormdrains can elevate stream temperatures and harm or kill sensitive fish and other aquatic life.

Water lawns only when they need it, normally when foliage appears dull, bluish-grey, or when walking on grass leaves footprints. Avoid frequent and shallow waterings which can cause thatch and shallow, drought-sensitive roots. Lawns require about one inch of water, although no more than once a week. To measure, place a flat pan under the sprinkler until one inch of water has accumulated, then move to a new location. Ensure that soil is moistened to a depth of four to six inches by pushing a screwdriver into the ground as your indicator. Turn off your hose if water starts to spill onto paved areas; wait 30 minutes, and resume watering.

The Water-Wise Landscape

As lawns require about five times more water than other plants in the landscape, the best water-wise practice is to reduce the amount of space dedicated to turfgrass, while also improving the quality of the soil and its moisture-holding ability.

Eliminate the competition. Lawns often run right up to and under trees and shrubs. However, grass roots easily "steal" water from these other plants, while still struggling to survive in the shade. Instead of grass, substitute an organic mulch, such as wood chips, shredded leaves or leaf mold, or plant ground covers -- you can even combine the both options for a low-water, low-maintenance, and attractive planting area.

Expand planting beds. Increase privacy and landscape value by developing "planting islands" in your sea of grass. Plant trees and shrubs in spacious, sweeping beds, rather than individually. Existing trees and shrubs can also be linked together as planting islands by adding an additional tree or two and replacing the lawn area between them with mulch or ground covers. In sunnier spots, "mulch islands" can be established, utilizing ornamental grasses, showy perennials, and hardy native plants. Eventually, over a period of time, these individual "islands" can become the dominant landscape feature, with lawn areas now serving as easily-managed green lakes and open spaces among a more natural, graceful, and beautiful setting.

Mass plantings. Similar to planting islands for trees, it is best to mass plants together, rather than spreading them across a broad area. Massed plantings have a stronger visual impact than a row of annuals dotted in front of shrubbery. Moreover, by grouping plants together according to similar water needs, they can be cared for much more easily, and can more readily care for themselves. A thick, established group of plants will keep out weeds and will shade the soil around their root zones, thereby conserving precious moisture and reducing drastic changes in soil temperature.

Xeriscaping. Although xeriscaping (xeros = dry) originally related to landscaping in extremely dry climates, its principles, which include using water-efficient and drought-tolerant plants, fit well with our water-wise goals. For example, using regionally adapted plants, such as the growing variety of natives, ensures that the plant can handle this area's seasonal temperatures and rainfall, along with other environmental and soil conditions. But non-natives can also be used to add color and texture to the garden, especially those which are suited for dry, sunny locations, like many of the Mediterranean herbs: rosemary, thyme, etc. Generally speaking, silver-grey plants, such as Dusty Miller, Artemisia, Santolina, and so, feature foliage which reflect sunlight, thereby keeping the plant cool and reducing water loss. However, xeriscaping does not mean using only colorless plants, Yuccas and Prickly pear cactus -- it does mean using the right plant in the right place. See below.

Mulch, mulch, mulch. Mulching with organic materials is one of the easiest methods for conserving soil moisture and providing long-term soil improvement. Mulches can be placed on soil up to four inches deep, except over shallow-rooted plants like azaleas. After applying mulch, especially when using wood chips or materials which appears dry, it is advisable to water both mulch and plants thoroughly at first. Dry mulch might otherwise keep moisture from percolating into the soil. Woody mulches are best used around permanent plantings, like trees and shrubs, while finer textured mulches, such as untreated grass clippings, compost, shredded leaves and leaf mold, are preferable for tender plantings, such as annual and perennial flowers and vegetables.

Compost, aerating, topdressing. Improving soil quality will also improve its soil retention ability. Garden beds can be amended by adding compost, either by digging it in manually or rototilling it into the soil, which is best done in autumn or early spring. Existing beds can be improved by using compost as a mulch or sidedressing anytime of year. Aerating a lawn allows air to reach grass roots, helps microorganisms break down organic matter to feed the lawn naturally, and facilitates water penetration. Topdressing is the practice of applying compost to the surface of the lawn up to one-half inch deep, increasing the soil's organic content, enhancing earthworm activity, and serving as a mulch to protect shallow grassroots.

Becoming water-wise can be as simple as changing some everyday practices -- or as involved and comprehensive as changing the face of your landscape. Like most endeavors, your success depends upon a program which matches your interests, abilities, and available resources -- although the ultimate goal of the water-wise landscape is to safeguard our existing water resources, and to provide more time for your other interests.

Copyright 2014, Joseph M. Keyser

Monday, August 04, 2014

Sage Advice on Salvias

Few plants have commanded such a central role in human history as common garden sage. First revered for its medicinal properties in antiquity, this unassuming member of the mint family was held sacred to the Greek and Roman gods, traded by the Dutch for tea from China, and has been revered by herbalists for millennia, from Dioscorides and Galen to your local GNC outlet.

Common sage (Salvia officinalis) is, however, but one member of the substantial genus Salvia, which actually takes its botanical name from the Latin salvus for “well” or “sound” (also salvere “to be in good health”), echoing its earliest association with curative and life-extending abilities.

Today, thanks to plant hunters and hybridizers, there are roughly 900 species of salvia found worldwide. And while few of them can genuinely promise immortality – or favor with the gods – there are probably a dozen or so which can liven up your garden, spice up your kitchen, and generally provide a healthy bit of habitat for butterflies and hummingbirds.

Limiting your choices is the hard part. My friend, garden writer and herb guru Kathy Fisher, once noted that of the 900 or so species of salvia, about 899 are worth growing. And why not? Consider a flower palette ranging from lipstick red and magenta to salmon, pink, white, and luscious blues which mirror the sky and deepen to violet and inky-blackish. The foliage on varied species can be lime or dark green, creamy white, or a mixture of pinks, purple, white, and green.

And while you might think that common sage is important enough for its culinary and medicinal applications (now a valued antioxidant), there are outstanding varieties which combine flavor and aroma with pure artistry. Golden garden sage (S. officinalis ‘Icterina’) features a swirling variegated pattern of golden yellow and green; purple sage has matte purple leaves which age to a soft green color; ‘Berggarten’ sage has very large silvery-gray fuzzy leaves; and ‘Tricolor’ sage with gray-green foliage splotched with pale pink, purple, or cream.

Most culinary sages feature lilac-blue flowers, some with dark purple sepals, save for ‘Albiflora,’ a real show-off with pure white flowers. Best of all, the scent and flavor of sage bestirs delicious memories of Thanksgiving, family, turkey and stuffing – although the herb is well-suited and renowned for use in tea, or with pork, soups, sausage, duck, cheese, various egg dishes, and savory breads. Remember that fresh leaves are appreciably stronger in flavor than dried, and that harvesting in the early morning provides the highest level of essential oils. For drying purpose, harvest in spring before flower stalks appear.

All of the officinalis sages are tolerant of heat and humidity, especially ‘Berggarten,’ and most should survive all but the harshest winters. True garden sage is the hardiest of the lot, but all will become leggy after several years and are best replaced at that time.

In the wider world of salvia, you will find species suitable as ground covers and edging plants, hanging baskets, and even annual shrubs or hedges. As most ornamental salvias come to us from Mexico and South America, they are too tender to survive the winter, and can either be treated as annuals, or they can be planted in containers and moved to an indoor location prior to frost.

Personally, I do not have the space to overwinter my favorite salvia, blue anise sage (S. guaranitica), a cobalt blue hummingbird magnet, which becomes a five feet bush by midsummer, but as salvias propagate easily from tip cuttings, I simply snip off three or four shoots in the fall, root them in water or a sterile medium, and care for these offspring through the winter care until they return to the garden.

Among some of other deservedly popular varieties are grape-scented sage (S. melissodora), whose pale blue blossoms exude an almost intense grape soda-like perfume aroma, unique in a genus where most flowers have a negligible scent.

‘Cleveland’ sage is heralded as the most fragrant variety of all sages. While most sages release their aroma after brushing against the foliage, “Cleveland’ readily wafts its scent with the slightest of breezes. Buckeyes beware! The plant was actually discovered in California, not Ohio, and was named after the nineteenth century plant collector, Daniel Cleveland, who first spotted the silvery-grey foliage on an expedition.

Pineapple sage (S. elegans) is one of the most popular salvias owing to the fresh-cut pineapple scent released whenever its leaves are bruised. It also sports brilliant -- and edible -- red flowers, appearing in late summer through fall. Pineapple sage is also one of the last great hummingbird plants to bloom in late autumn, and provides the balance of vital nectar needed by migrating ruby-throated hummers as they head south. Scarlet pineapple sage has larger, deeper colored blooms, and the cultivar 'Frieda Dixon' has pink flowers.

Autumn sage (S. gregii) provides an abundance of drought-tolerant cultivars with non-stop and profuse blooming habits. Easily found examples are Maraschino’ (like the cherry) with scarlet flowers; ‘Wild Watermelon’ in fuchsia; aptly named ‘Plum Wine’ and ‘Raspberry Royale’; ‘Moonlight’ with pale yellow blooms, and ‘Desert Blaze’ which contrasts fire engine red flowers against creamy-white and green variegated foliage.

From ancient Greek physicians to a solitary planter on your patio, there’s a world of salvias just waiting to enhance your life and gardening enjoyment. Now that’s sage advice!

Copyright 2014, Joseph M. Keyser

Friday, August 01, 2014

Cleaner, Greener Office Spaces

The modern office (or "Cube Farm") is generally a product of strict efficiency and economic design. Lines are straight, wall-coverings are bland, windows are sealed shut, lights fluorescent, and cubicles ubiquitous. And this is where many of us spend the better part of our lives. Perhaps it’s time to consider personalizing – and naturalizing – these uninviting spaces. And the best place to start might be with a favorite houseplant brought from home.

It’s amazing what a welcome addition a plant can be in the workplace. It’s just a simple little living thing, and yet, perched amid the photocopied reports, Post-it notes, and tangled telephone cord, it has the power to transform even the most cluttered of desktops into something uniquely you -- and special.

Even if you have only one African violet by your elbow, it might be enough to distract you from your spreadsheet for a few moments to examine whether a new batch of flowering buds is forming. Perhaps an office mate will wander over to ask you how often you feed your plant, or where you got it. In a sterile environment, that humble plant is an oasis of life. Your spreadsheet can wait.

And if one plant can work such wonders, what about an office-full of them? Truly, plants can enhance the modern office in ways that most people can barely imagine.

Aesthetically, plants can add color and texture to almost any space, however plain. Taller plants or groupings of larger plants can become living architecture to help direct foot traffic, soften harsh corners, create privacy in seating areas, or add verticality in an unending sea of cubicles. Hanging or elevated planters can create a sense of movement when filled with hanging grape ivy or trailing philodendron vines.

Using similar plants throughout a larger space can also provide a unifying or cohesive element, tying and blending together a disparate array of desks, copying machines, doorways, cabinets, and partitions. The final impression is calming and ordered, rather than chaotic.

Plants can function as eye-catching focal points, or discretely mute or camouflage unattractive features. Above all, they add a sense of vitality to an interior landscape of metal and machines.
They can also play a substantial role in promoting physical and psychological health. Clinical studies in Britain and Northern Europe have shown that plants in the workplace reduced stress levels and fatigue by more than 30 percent, along with the symptoms associated with colds and flu, such as coughing and sore throats.

These green allies can also promote good health by cleaning a host of potentially dangerous pollutants from indoor air. Those veneer-and-laminate bookcases, formica-clad desks, carpets, painted walls, and computers, printers, and fax machines are off-gassing a variety of volatile organic compounds (VOCs), including formaldehyde. All-in-all, it’s a nasty stew of bad air, generally trapped – along with you – in a closed loop ventilation system.

Fortunately, there’s Mother-in-law’s tongue. I don’t mean my mother-in-law, Melva, who’s also very helpful and health-conscious, but the plant, also known as snake plant (Sansevieria trifasciata). This popular and sturdy plant grows elegantly tall, and sometimes flowers, even in low-light, and it is an absolute whiz at snatching pollutants from the air.

But Sansevieria are not alone in this ability. NASA studies in the late 1970s identified a large number of common indoor plants capable of filtering VOCs from the air. They ranged from aloe vera, which needs bright light, but is easy to divide and share with office mates – and serves as a nifty balm for paper-cut fingers, to magenta-striped dracaena, peace lily, and golden pothos, perhaps the toughest indoor plant around.

Simply put, most of the plants best suited to indoor conditions can help clean indoor air. Moreover, ongoing studies show that plants clean the air not only through the stomata or microscopic pores on the leaf surface, much like the filters in home furnaces and HVAC systems, but also through the action of bacteria in the potting soil, which normally make nutrients available for the plant’s root system.

In controlled environments, the soil microorganisms were capable of removing and absorbing up to 20 percent of the air contaminants. Together with the plants themselves, these invisible colonies represent an indoor living system functioning much like the trees, grasses, and algae found outdoors.

But the real value of introducing plants probably goes deeper than stress-busting, filtration, and décor. In a world that keeps us indoors far-too-long, bringing a bit of the outdoors inside keeps us connected with a larger living world. And beyond the momentary distraction of looking at a blooming bromeliad, the plants also require watering, feeding, and care. They require a time apart from the routine of databases and spam-deletion – a time to actually nurture another living thing. Surely that’s a simple enough bit of occupational therapy.

And then there’s the issue of community – human, not plant. In a world of passwords and name badges, your salmon-budded kalanchoe is a bridge to fellow workers. Perhaps you might divide up one of your succulents for them, or share the decades-old history of your mother’s braided willow-leaf ficus, now thriving by your window. They in turn might bring in a rooted cutting for you, or ask to share a window ledge for their Christmas cactus. That’s how friendships – and communities -- start.

Your office plant can stretch forth your personality, invite a much-needed compliment, and allow you to share and connect with others. It shows, quite humbly, as Shakespeare noted, that “One touch of nature makes the whole world kin.”

Copyright 2014, Joseph M. Keyser