Friday, September 17, 2010

Chrysanthemums: Jewels of the Fall Garden

Labor Day has just passed, and for many of us, it signals the near arrival of fall. Not surprisingly, a recent visit to my neighborhood Whole Foods market was greeted by an especially color sight. Mums. Mountains and mounds of them. And how timely. After all, as the sun slips lower in the sky, we'll find a new kind of light. An "autumn light" which is mellow, warm and golden, and almost seems to glow across our landscape. Gardeners, looking to respond to that gentle light, will find no plant which can echo the gentle colors of fall more kindly and completely than the chrysanthemum.

The chrysanthemum is often called the “queen of fall flowers,” and is actually the largest commercially produced flower in the United States, both as a potted plant, and in floral arrangements, where chrysanthemums are valued as one of the longest lasting cut flowers.
Mums are members of the Asteraceae (or Compositae) family, the largest family of flowering plants, and is related to asters, dahlias, marigolds, zinnias, and most other daisy-like flowers. A closer look at a plant will reveal that the single bloom is actually made up or “composed” (hence Compositae) of hundreds of small flowers or florets, with ray florets on the outer edge of the flower, and disk florets at the center of the blossom.

The origins of the mum take us to China at least as far back as the 15th Century B.C., where the plant was cultivated as a flowering herb for use in salads, brewing beverages for special celebrations, and curing headaches, possibly caused by those celebrations.

Please note that only the flower petals of today’s ornamental mums are edible. While there is an edible chrysanthemum called garland or vegetable chrysanthemum (Chrysanthemum coronarium), with leaves reminiscent of today’s ornamental variety, hungry gardeners should not attempt to eat the foliage of garden chrysanthemums.

During the eighth century A.D., chrysanthemums began to appear in the literature and art of Japan. Called Ki-Ku, “Queen of the East,” a single blossom of the flower was used as the crest of the emperor, and Chrysanthemum Throne is the common name for the Imperial Throne. Today, chrysanthemum is the national flower of Japan.

Chrysanthemums gained attention in the West in the 17th century, and were so-named by the botanist Linnaeus who combined the Greek “chrysos” with “anthemon” to describe a “golden flower.”

Of course, mums are a lot more than golden flowers these days. Horticultural breeding now provides a dizzying variety of forms, colors, and growth habitats. The National Chrysanthemum Society recognizes 13 different classes of mum, many of which are familiar to gardeners, such as spider, anemone, quill, spoon, and pompon, although marketing efforts also tout mums with fanciful names such as football mums, maxi-mums, pin cushion, and many more.

Beyond interesting floral shapes, these jewels of autumn are resplendent in russets and gold, red, yellow, gold, orange, pink, purple and white, and can be planted in solid masses of color, or mixed together like a living tapestry.

Of special interest is a fairly recent and popular mum, ‘Silver and Gold,’ which provides variegated foliage along with attractive blooms and desirable winter hardiness.
Chrysanthemums can be sited almost anywhere in the landscape, in planters by a front door, as border plantings along a driveway, or mixed into a year-round garden bed to provide a quiet splash of color.

Planted in beds around and beneath trees, the colors you select can mirror or complement the seasonal color of the leaves overhead. Above all, the mums can provide a dramatic climax for your landscape before the arrival of winter.

However, before you run off to your local supermarket to pick up your bounty of mums, you should consider a few important details. Most important of all, be sure to select hardy garden mums, not the foil-wrapped, potted florist mums. The mums commonly given as housewarming gifts are probably not winter hardy, and also tend to become quite tall, and will provide few blooms beyond the care and feeding of a greenhouse manager.

Instead, turn to a reputable garden center, where the mums are already somewhat acclimated to cooler temperatures, and where the plants were initially bred for use as perennials. Seek advice from a staff horticulturist if you are uncertain about your selection.

You will want to ensure that your mums will receive about six hours of sun, and should be planted in organically-rich, well-drained soil. Consider improving your soil by adding compost and prepare the planting bed eight to 12 inches deep.

After planting, water the mums thoroughly and water weekly thereafter, carefully avoiding wetting the foliage which can cause mildew. After the flowers have faded, snip off spent blooms and mulch the bed with shredded leaves or shredded hardwood mulch about three inches thick.

Keep in mind that there may be some losses if the winter months are especially harsh. Generally, spring-planted mums have a better survival rate than those planted in fall, but proper care can make a significant difference.

In early spring, pull back the mulch to allow new shoots to emerge and prune back old stems to the ground. After plants start growing fully, pinch back about four inches of growth every three to four weeks until July to encourage bushy growth, a full head of flowers, and an autumnal blooming period.

Every other spring, starting in about two years, divide your mums by digging up the entire plant, then use a sharp knife to separate well-rooted outer pieces from the original plant. Space out and replant the new pieces, and send the old woody core to the compost pile.

Interestingly, you will find that chrysanthemums seldom receive the recognition they deserve. For example, Preakness fans think they are seeing the winning horse and rider presented with a blanket of Black-eyed Susans. Not so! Those flowers are actually mums, substituted for the summer-blooming Maryland state flower.

A rose by any other name? You will also find that there are few roses adorning those colorful floats in the Rose Bowl Parade in Pasadena. Instead, delighted viewers are enjoying a kaleidoscope of mum blossoms and petals. But mums the word on that!

For more information on growing and appreciating mums, turn to the National Chrysanthemum Society and their website: www.mums.org.

Copyright 2010, Joseph M. Keyser

Wednesday, September 15, 2010

Meditations on a Monastic Garden

A garden can play many roles in our lives, depending on its design and intent: a treat for the senses, a source of sustenance, or a simple place to mess about with plants. But certainly one of the most important and traditional roles is as a unique place away from the world and worldly concerns. This special sort of garden can serve as an area for reflection, meditation, and spiritual healing. Indeed, for many of us, while we acknowledge having lost Eden, we haven’t given up on trying to recreate an ideal space for body and soul.

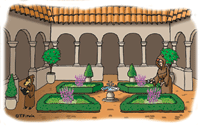
Perhaps no finer model for this meditation garden exists than the great monastic gardens which flourished for more than a millennium. By their very nature, these cloistered gardens were physically separated from the outside world by walls and roofed arcades, allowing visitors to focus within: both on the inner features of this peaceful garden, with its tranquil fountain, fruit trees, and healing herbs – and, more importantly, within themselves.

In fact, the very act of enclosing a garden reflects an almost primal understanding of what a garden is. For fun with philology, we can look to the etymology of “garden” and find the proto Indo-European root word “ghor-dho,” which means “enclosure.” (That word is also related to “yard” and the Latin hortus, as in horticulture.) Perhaps more interesting, medieval cloistered gardens were often called paradise gardens, hearkening back to Eden, with the word “paradise” coming to the West as pairidaeza, from the Old Persian, also meaning “walled enclosure.” The West, after all, did not have a monopoly on enclosed gardens.

To create a true garden meant separating your plants – and your person – from the world outside. And as our world is no more peaceful than that of the abbots who created the Benedictine and Cistercian monasteries, perhaps we might just want to return to the notion of a cloistered garden of our own.

Naturally, your three bedroom colonial might not easily lend itself to the addition of a finely cut stone-walled quadrangle, but you can at least separate your meditative space from the rest of your landscape with a simple wooden fence, trellises, arbors, or a planting of shrubs. You’re simply looking for a private inner space where you can turn within.

Following the lead of the monastic gardens, which typically observed a formal layout of rectangular beds and pathways, you might want to establish raised beds, another common medieval feature, in which to cultivate herbs and vegetables. After all, St. Benedict in the 6th century required that his monks provide all their own “necessaries” within the walls of their monastery. Not unlike the Victory Gardens of the 1940s.

Herbs were especially important to the monastic garden, as any fan of the Brother Cadfael mysteries knows. Medicinal plants were at the heart of monastic life, where monks studied and recorded the therapeutic properties of roots, dried leaves, and fruits, thereby institutionalizing modern pharmacology, much as the abbeys laid the groundwork for hospitals. Consider a quick visit to a public herb garden to identify medicinal and other herbs for your garden. You will be surprised that key medieval herbs are still favorites today.

Fruit trees, another symbol of paradise (munching on which led to man’s expulsion), were common features in almost all medieval gardens, and might adorn your garden, as well. Of course, barring the presence of a serpent, you should feel free to enjoy any of the apples or plums that you grow.

And while planning your bit of backyard paradise, remember that fragrance can stir memory and reflection, much as incense is used in both Eastern and Western religious traditions. Depending on your taste, you might plant soft musky-scented English boxwoods as a formal edge to your pathways, or choose from the palette of native shrubs and vines such as buttonbush or arbor-loving virgin’s bower.

The center of your garden should host a single, strong element, whether a trickling fountain, birdbath, or piece of sculpture. Original medieval works are probably out of the question, but concrete knock-offs of the Irish St. Fiacre (patron saint of gardeners) can be found in various garden shops, especially those associated with cathedrals, naturally.

Lastly, remember to set aside an area where you can actually sit and enjoy – and use – your meditation garden. That means setting aside time as well. The world goes along in its bumpy chaotic way, but you can still find a peaceful retreat and solace for your soul in paradise, even if it’s only in your backyard.
A personal note on cloistered gardens:
I strongly believe that at one time or other, nearly everyone has been profoundly influenced by a special place or an experience of place. For a young kid from Brooklyn, that place was the Cloisters in in New York, the Metropolitan Museum of Art’s world-renowned and truly staggering collection of medieval art. The Cloisters is a museum woven around five actual monastic gardens disassembled and reassembled stone-by-stone in Ft. Tryon Park, overlooking the Hudson River. At around age 12, I experienced the Cloisters for the first time with my father one late winter’s day. I remember the scent of lemon and orange blossoms from potted trees dotting the glass-screened arcades; the burbling sound of fountains competing with Gregorian chant echoing through the complex. That single visit ultimately led to my educational life as a medievalist, my vocation as a horticulturist, and created a cultural passion that informs each and every moment of my life. Today, my wife (a medievalist) and I are on the verge of planning the construction of my dream home: it will have bedrooms, a kitchen, library, and all the rest – and it will be built around a central courtyard, a garden, with herbs and fruit trees and fountains. Evidently some places change you forever.

Copyright 2010, Joseph M. Keyser

Sunday, July 11, 2010

Water-Wise Landscapes

During the hottest summer months, our lawns and gardens face a number of environmental challenges which threaten their health and beauty. Wilting and discoloration of lawns and foliage is a common example, as are flowers dropping buds, or tomatoes succumbing to blossom-end rot. And yet these symptoms also herald additional complications, as voracious insect pests and fungal diseases find an easy prey in plants under stress. The root of the problem is soil moisture and whether plants are getting enough to drink during cloudless, 90 degree days.

The solution to dry soils and drought, however, is not simply to run a hose and run up a huge water bill. Watering is very often the most wasteful and expensive of solutions -- with improper watering or overwatering leading to even more short and long-term problems for the landscape. To keep your corner of the globe green, it is best to become water-wise.

Liquid Lawn Care

Lawns are the dominant part of most landscapes. Grass is easy to put in, especially over a large area, but keeping grass green and lush is another story. Lawns are notorious water hogs, with most doting homeowners applying much more water than a lawn really needs, often squandering as much as 100,000 gallons on a typical quarter-acre suburban lot. Fortunately, there are a number of simple water-wise practices that can actually improve the health of your lawn, while saving money, time, and tens of thousands of gallons of precious water.

Stop watering. Although it sounds like lawn care heresy, most grasses (except bluegrass) can safely be allowed to enter a period of dormancy during the driest part of the summer. In fact, dormancy is a natural mechanism to help grass survive drought and heat. Your lawn will recover with the return of rain and cooler temperatures.

Stop fertilizing. The worst possible time in the year to apply fertilizer is in the summer. That jolt of nutrient pushes grass plants to grow unsustainably, risking health and vigor, and interrupting root development when it is most needed. Wait until fall before even thinking about fertilizing.

Grasscycle. Let grass clippings remain on the lawn when you mow, and cut your grass no lower than 3 inches. Clippings are over 90 percent water, and, as they filter to the soil surface, they provide a temporary layer of mulch to conserve soil moisture; taller grass also shades the soil, reducing surface heat and evaporation.

Watering do's and don'ts. If you must water, do it right. Water only in the early morning, never during the day or in the evening; improper watering can lead to fungal diseases or scalded foliage. Do not water on windy days, as breezes only hasten evaporation. Do not water driveways, streets or sidewalks; in addition to wasting water, runoff entering stormdrains can elevate stream temperatures and harm or kill sensitive fish and other aquatic life.

Water lawns only when they need it, normally when foliage appears dull, bluish-grey, or when walking on grass leaves footprints. Avoid frequent and shallow waterings which can cause thatch and shallow, drought-sensitive roots. Lawns require about one inch of water, although no more than once a week. To measure, place a flat pan under the sprinkler until one inch of water has accumulated, then move to a new location. Ensure that soil is moistened to a depth of four to six inches by pushing a screwdriver into the ground as your indicator. Turn off your hose if water starts to spill onto paved areas; wait 30 minutes, and resume watering.

The Water-Wise Landscape

As lawns require about five times more water than other plants in the landscape, the best water-wise practice is to reduce the amount of space dedicated to turfgrass, while also improving the quality of the soil and its moisture-holding ability.

Eliminate the competition. Lawns often run right up to and under trees and shrubs. However, grass roots easily "steal" water from these other plants, while still struggling to survive in the shade. Instead of grass, substitute an organic mulch, such as wood chips, shredded leaves or leaf mold, or plant ground covers -- you can even combine the both options for a low-water, low-maintenance, and attractive planting area. [See the posting: Ground Covers: Made in the Shade, August 25, 2007.]

Expand planting beds. Increase privacy and landscape value by developing "planting islands" in your sea of grass. Plant trees and shrubs in spacious, sweeping beds, rather than individually. Existing trees and shrubs can also be linked together as planting islands by adding an additional tree or two and replacing the lawn area between them with mulch or ground covers. In sunnier spots, "mulch islands" can be established, utilizing ornamental grasses, showy perennials, and hardy native plants. Eventually, over a period of time, these individual "islands" can become the dominant landscape feature, with lawn areas now serving as easily-managed green lakes and open spaces among a more natural, graceful, and beautiful setting.

Mass plantings. Similar to planting islands for trees, it is best to mass plants together, rather than spreading them across a broad area. Massed plantings have a stronger visual impact than a row of annuals dotted in front of shrubbery. Moreover, by grouping plants together according to similar water needs, they can be cared for much more easily, and can more readily care for themselves. A thick, established group of plants will keep out weeds and will shade the soil around their root zones, thereby conserving precious moisture and reducing drastic changes in soil temperature.

Xeriscaping. Although xeriscaping (xeros = dry) originally related to landscaping in extremely dry climates, its principles, which include using water-efficient and drought-tolerant plants, fit well with our water-wise goals. For example, using regionally adapted plants, such as the growing variety of natives, ensures that the plant can handle this area's seasonal temperatures and rainfall, along with other environmental and soil conditions. But non-natives can also be used to add color and texture to the garden, especially those which are suited for dry, sunny locations, like many of the Mediterranean herbs: rosemary, thyme, etc. Generally speaking, silver-grey plants, such as Dusty Miller, Artemisia, Santolina, and so, feature foliage which reflect sunlight, thereby keeping the plant cool and reducing water loss. However, xeriscaping does not mean using only colorless plants, Yuccas and Prickly pear cactus -- it does mean using the right plant in the right place. See below.

Mulch, mulch, mulch. Mulching with organic materials is one of the easiest methods for conserving soil moisture and providing long-term soil improvement. Mulches can be placed on soil up to four inches deep, except over shallow-rooted plants like azaleas. After applying mulch, especially when using wood chips or materials which appears dry, it is advisable to water both mulch and plants thoroughly at first. Dry mulch might otherwise keep moisture from percolating into the soil. Woody mulches are best used around permanent plantings, like trees and shrubs, while finer textured mulches, such as untreated grass clippings, compost, shredded leaves and leaf mold, are preferable for tender plantings, such as annual and perennial flowers and vegetables.

Compost, aerating, topdressing. Improving soil quality will also improve its soil retention ability. Garden beds can be amended by adding compost, either by digging it in manually or rototilling it into the soil, which is best done in autumn or early spring. Existing beds can be improved by using compost as a mulch or sidedressing anytime of year. Aerating a lawn allows air to reach grass roots, helps microorganisms break down organic matter to feed the lawn naturally, and facilitates water penetration. Topdressing is the practice of applying compost to the surface of the lawn up to one-half inch deep, increasing the soil's organic content, enhancing earthworm activity, and serving as a mulch to protect shallow grassroots.

Becoming water-wise can be as simple as changing some everyday practices -- or as involved and comprehensive as changing the face of your landscape. Like most endeavors, your success depends upon a program which matches your interests, abilities, and available resources -- although the ultimate goal of the water-wise landscape is to safeguard our existing water resources, and to provide more time for your other interests.

Copyright 2010, Joseph M. Keyser

Sunday, May 23, 2010

Rain Gardens: Harvesting the Heavens

For imaginative landscapers, rain gardens may represent the perfect marriage of heaven and earth. Specially-designed garden areas help to receive and store rainfall, using that moisture to nourish an oasis of interesting native plant communities reminiscent of lush stream banks and freshwater marshes.

The notion of developing rain gardens has received a lot of attention across the country. Jurisdictions from Seattle, Washington, to Prince Georges County in Maryland, have made considerable progress in developing “bioretention” structures to control the quantity and quality of stormwater runoff, seeing rain gardens as attractive, cost-effective options to curbside storm drains and large stormwater ponds.

In essence, rain gardens function like miniature wetlands. Rainwater from paved surfaces and downspouts is directed to a low-lying garden area which allows the water to be stored temporarily until it is absorbed by the plants and soil. Any pollutants, such as fertilizer, pesticide residue, or even oil, grease, and heavy metals from roadways, are effectively trapped by the rich organic soil and root systems in the garden, permitting clean water to slowly soak down through the soil and rocky subsoil until it “recharges” groundwater supplies.

Sophisticated rain gardens are designed to accommodate all of the rainwater from a surrounding area: rooftop, driveways, walkways, and so on. Moreover, a true rain garden is developed with consideration for existing soil types, and often includes underdrain systems, in addition to lasagna-like layers of gravel, landscape fabric, sand, and amended soil. However, while effective, the bonafide approach is complicated and relatively expensive. And most homeowners do not have the stomach for bringing earth moving equipment into their backyards and turning 60 percent of their landscape into a stormwater marsh.

Fortunately, many of the features and benefits of a carefully engineered rain garden can be employed by backyard gardeners willing to give up a bit of lawn in favor of a colorful, low maintenance backyard habitat.

A basic approach might be to identify at least one downspout which can be redirected toward an area which slopes gradually away from your home. Keep the rain garden at least 15 feet away from the building, and ensure that all water flows away from the house to prevent dampness or flooding in your basement.

Layout your garden on the gentle slope, preferably in an irregular shape, such as a kidney bean or round-cornered crescent. Use an old hose to help create an attractive outline and start removing the top layer of turf and soil. For your garden to effectively capture runoff, dig down on an angle to about one foot. Most of the material you remove can be used to build up or “berm” the sides of the garden.

The next step is the most crucial. Your goal is to create an area which will act like a sponge to soak up hundreds of gallons of rainwater. Local heavy clay soils will never function properly, and you will need to amend or replace the clay with compost – and lots of it. You can use the compost by itself, or mix it with topsoil and even some of the soil you have excavated. You might also want to add well- rotted leaves to the mix.

Flexible downspouts can deliver water to your garden, or you might bury corrugated drainage pipe in a trench and bring it to within one or two feet of the garden. It is important to allow rainwater to run over a grassy area or planted buffer before reaching the garden. You do not want a surge of rainwater to start eroding soils and washing away mulch.

Planting is, of course, the fun part of the process. But before planting, let your garden handle several rainstorms first, to ensure that your soil amendments have settled appropriately, and to guarantee that water will not pond in the garden more than three days. If done properly, excess rainfall will flow over the garden and continue across your lawn, and water “harvested” by the garden will be absorbed within 24 hours. If water ponds for three days or more, you will need to improve the soil with more organic amendments and possibly lower the downslope side of the garden to improve runoff.

The plants you select for your rain garden are often unlike those used in conventional settings. Native perennials that enjoy moist and even saturated soils will thrive in your garden, and will encourage visitation by butterflies, hummingbirds, and other nectar and berry feeders. Your pallette can include swamp milkweed, columbine and asters, ironweed, lobelia, blue flag, bluebells and bluestem grasses, bee balm, ferns, sedges and switchgrass, boneset, gentians, liatris, and much more.

Many of these natives are now sold by local nurseries, where experienced horticultural staff can help match suitable plants with your rain garden needs. You will need to consider sun or shade exposure, how moist your garden soil is and the duration of wetness, and also think about how well your plant selections can tolerate drought periods. And, after planting, be sure to mulch your garden to save every drop of precious rainwater.

For more information about rain gardens, be sure to check out my former website: RainScapes.org.

Copyright 2010, Joseph M. Keyser

Wednesday, April 14, 2010

A Clean Sweep for the Spring Garden

With warmer days at hand, many of us are heading outdoors to spruce up our yards. These spring chores offer an excellent opportunity to significantly improve the health of our lawns and gardens, which will later save time, energy, and resources.

To begin, start cleaning up fallen leaves, broken branches, twigs, and dead foliage lying under shrubs, trees, and in planting beds. Sanitation is important in maintaining a healthy garden for a number of reasons: fallen leaves can clump together, inhibiting the passage of air and water to the root systems of your plant. Don't use or plan to use whole leaves as a mulch. Also, there are a number of pests and disease organisms which can winter-over in garden debris. Removing these havens removes the pests.

But don't throw those leaves and other trimmings away! All of them can be easily composted, breaking down into a wonderful mulch or soil conditioner for use this coming fall. Branches and larger twigs can be placed on the ground or inside the bottom of a compost bin to facilitate drainage and aeration. Leaves and other materials -- including some of those weeds which are now popping up -- can then be added to the pile. Gradually moisten materials as you put them in. Avoid adding twigs larger than your thumb in diameter -- and no more than 6-10 inches long.

After your "clean sweep," it's time to consider mulching. There are numerous organic and inorganic mulches from which to choose. Most are helpful in suppressing or eliminating weeds (no weeding! no toxic chemicals!), conserving soil moisture and moderating soil temperatures -- which is critical during droughts and heat waves -- and most can improve the appearance of your yard. However, by using materials like shredded leaves, leaf mold, compost, or wood mulch, you are restoring vital nutrients and organic matter and improving soil health. Remember that healthy soil produces healthy plants.

Mulches can be purchased, made, or picked up free. Many municipalities have wisely elected to make chipped or ground-up leaves and woody debris available for free to residents -- either to be picked up from a central location, or even delivered for a nominal fee in some really progressive communities. Bear in mind that this shredded mulch -- like mulch from tree care companies -- is unaged and only suitable for application around established plantings, or used for pathways or play areas. Fresh-shredded wood mulch should be aged or composted for at least six months before using around tender plants like ground covers, flower beds, or vegetable gardens.

Many gardeners and professional horticulturists prefer using leaf mold or leaf mulch. This material breaks down more rapidly than wood mulch and is easily turned into the soil as an organic conditioner. Leaves which have been shredded by a lawn mower or chipper-shredder can be used immediately as a mulch -- or aged for several months to achieve a finer texture and darker color. Whole leaves which have been composting for six to twelve months can also be used, provided they have decomposed and fall apart while handling. And rich, crumbly black compost naturally makes an excellent mulch.

To ensure weed suppression, it often helps to first lay several sheets of newspaper (not this column) or cardboard on the ground around and under trees and shrubs -- or in garden beds. Dampen the newspaper with your hose to keep it in place, and then pile the mulch on. Never apply a layer of mulch over four inches deep, and never place it directly against the trunks of trees and shrubs.

And now you can enjoy the warmer weather -- and the rest of the year. By cleaning, composting, and mulching, you've established a yard which will stay healthy year-round. Back-breaking weeding can be avoided, many plant diseases have been physically eliminated, climate-related stresses have been headed-off, and your organically-enriched soil will grow healthy, beautiful plants naturally. The way Mother Nature intended.

Growing Fun With Your Compost Bin

You can start to enjoy your compost long before it's ready to use. Since many of us set up compost bins in our vegetable garden, it's time to use those bins to their best advantage. Here's how:

Compost cages can be made from sturdy 10 to 13 foot lengths of wire mesh. Make your cage, fill it with compost-ables (leaves and other trimmings), and plant four to six tomato plants (or veggie of your choice) around the base. As the vines grow, tie them to the cage and guide them up and over the top of the pile. Your compost bin now doubles as a tomato cage -- so you're not wasting space, the materials in the bin serve as a mulch to keep plant roots cool and moist during the hottest weather, and -- best of all -- as the materials decompose, nutrients and micro-nutrients are fed directly into the root systems. No fertilizing, no fuss -- just fruit!

In any sunny location, you can grow pounds and pounds of wonderful sweet potatoes in almost any sort of compost bin using leaves alone. Place moistened leaves in a bin, packing them down, and filling to the top. One full month after the last frost, plant six sweet potato slips (root sprouts -- available at many nurseries and garden centers) into the top of the leaf pile. YOU MUST KEEP THE PILE MOIST AT ALL TIMES. After several weeks the vines will take off, soon cascading over the sides and covering the entire bin. It's compost camouflage! After leaves begin to yellow in the fall, harvest your tubers, use the composted leaves in your garden, and add the vines themselves to next year's compost pile.

Copyright 2010, Joseph M. Keyser